
After an exhausting day of travel, I couldn’t wait to get home and get printing. I started by making a hardware store run to get some closet hanger things to make something to hang filament from. Matt says that the filament will run smoother if it’s hanging above the printer. Based on how it operates, I believe it. In the photo on the right, you’ll notice that I just took an unspooled 1-lb package of ABS and stuck it on the conduit above. This came back to bite me later. This stuff gets super tangled as it’s pulled through the printer. I’m making it a point to ONLY buy spooled filament from now on. Since I have several pounds of unspooled stuff though, I have a solution coming in a future post..
I downloaded Pronterface and Slic3r and grabbed a 3d scan of my daughter and tried to get going. Arduino installed just fine, and Pronterface was able to connect to the board with no issue. Slic3r crashed several times while trying to create the G-Code. I then tried the version bundled with Pronterface, and my G-code was created without issue. I flipped the heated bed and extruder on and loaded some filament. Time to get printing!
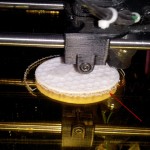
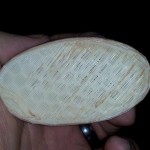
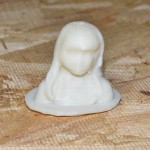
The first layer looked a bit funny right from the get go. It had some kind of nest building beneath it. I figured that I had some setting off. I didn’t realize it was such a problem, but I continued to print anyhow. It appeared to be printing straight other than that first layer. As you can see from the photos below, When the first layer doesn’t stick, it’s very stringy and you can see through to the bottom if you pull some of the loose strings off. (Ignore the brown marks on the bottom. That’s bronze paint, not burns.) As you can see on the right though, I did get a decent looking print my very first time, even if the bottom was messed up.
After the excitement of completing a print, I tried a new print bed and tried to get the X, Y, and Z axis to level properly. Everything appeared to be OK until I started printing. As you can see from the photo below, I definitely have some sort of trouble with my Z-axis height. The first lines of a print should be straight and smooth, not squiggly looking as you can see here.
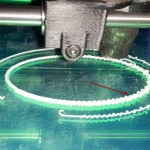
After messing around with the screws for the layer height for several hours/days, I finally was able to get the extruder to be perfectly level, or so I thought. Every time a new print would start, the bed would appear to some sort of leveling, which took the extruder nozzle lower than the normal bed height, causing me to scratch the kapton or PET tape several times. This was very frustrating and expensive. At this point, I figured out the problem might have been in the G-code I was generating. I was using the default Slic3r settings, which inserted these two lines at the beginning of every print.
G28 ; home all axes
G1 Z5 E5000: lift nozzle
I don’t know what any of that is really doing, but I suspected that this was causing something to happen with my extruder nozzle. I started reading Ryan Burns’ Blog, as he was one of the first to put together a guide on assembling a Vision 3D printer. I decided to change my start G-code to his, and this was it.
M92 X90 ; X steps per mm
M92 Y90 ; Y steps per mm
M92 Z3200 ; Z steps per mm
M92 E660 ; Extruder steps per mm
G28 ; home all axes
After another printing attempt, I was finally getting some clean lines. The extruder stayed at the level I set it at, and all was mostly OK. (Note: Future posts in this blog will show photos of items I printed before I figured all of this out. I probably printed a dozen objects before I discovered my G-code issue.) In any case, after a week+ of struggling with settings, I’m finally ready to get down to business!
