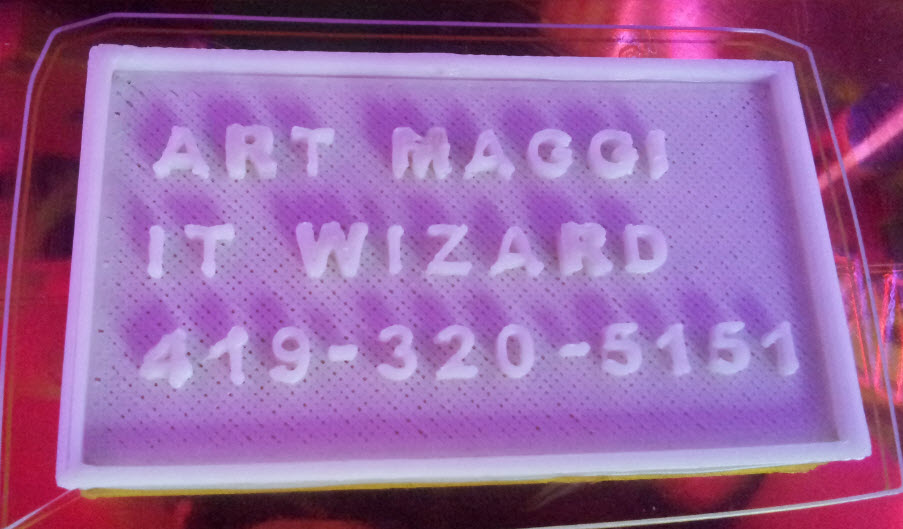
I wasn’t going to write this up, as these cards contained my phone number, but I couldn’t resist. (What’s gonna happen? Someone will call me and I’ll ignore it? Worst case scenario, I change my number and email address.) These were too cool. I saw this little poker chip sized pirate coin that Matt Underwood had printed with his Vision 3D printer, and knew that fine details and small, thin stuff could be achieved. Figuring out how was my big issue. I started by trying to print some basic cards with the nozzles/settings I was used to. The first few were just unreadable. Next, I tried simplifying my design. Simple block text should do it, right? Nope. (Slowing my print down may have helped here. See the one on the right.)
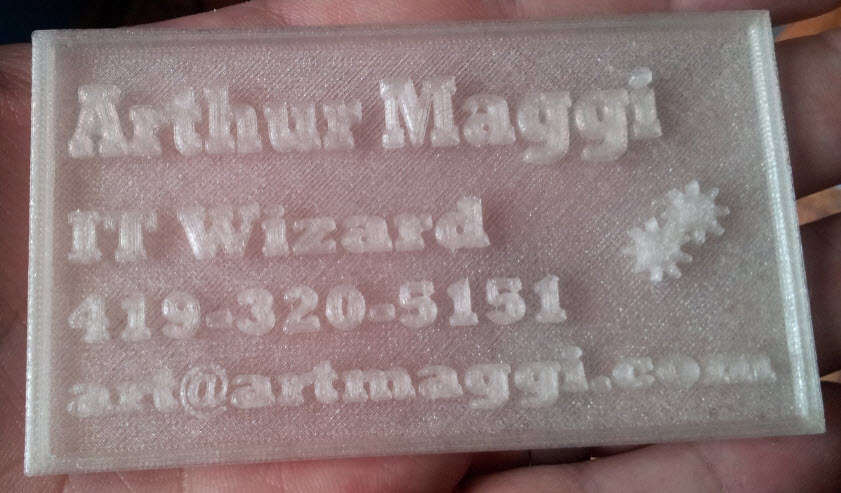
I then ordered a .25mm and .35mm nozzle from Ultimachine. I tried again with the .25mm nozzle. It was suddenly looking better, but it still wasn’t quite what I wanted. At this point, I decided to slow the print down a bit, and there it was. Clear, readable text on a 3d printed card.
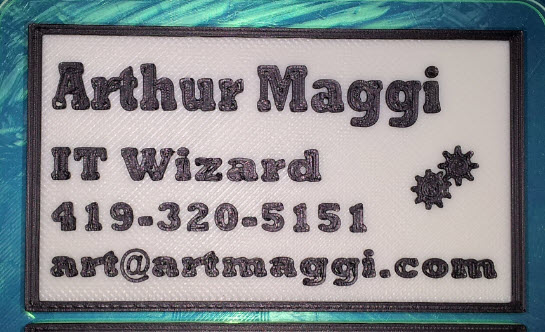
I then decided to move up to the .35mm nozzle and see if I could achieve the same result. The cards had a few more holes in the lettering, and no amount of fiddling would make it go away, but I decided that it was still readable, and I wouldn’t need to switch/hotends and nozzles all the time.
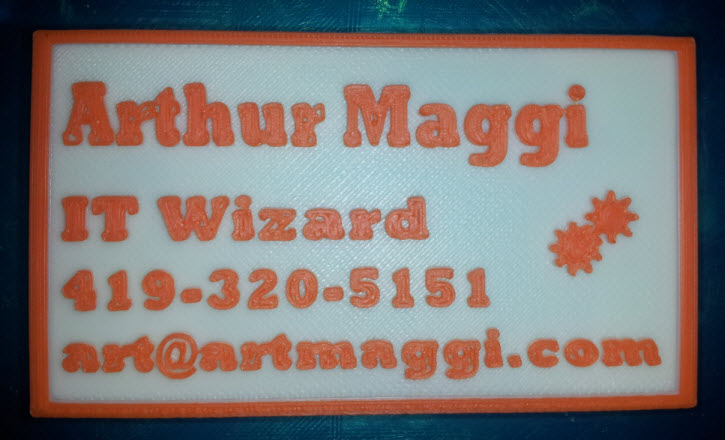
My next challenge was to add some color. Ideally, this is where my dual extrusion system comes into play, but I don’t think that will ever work the way I want, even when I do eventually get my printer. (It will allow me to have both a .25 or .35 and .50mm nozzle loaded at all times though. Good enough.) We tried painting them at first. The results were good, both on ABS and PLA cards. It was difficult to do though without spillage onto the card. For fun, they’re great. If I wanted them to be “professional” looking cards, they would require practice.
My next idea was just joining filament together at the point where it would start printing letters. I figured out how far into the print that would be, and measured out some filament. I saw a video online where someone had joined filament together with a lighter, and tried to replicate that with a candle. The results were ok, but hard to control. I called Matt Underwood to see what he does to join filament, and he says his splices were made with some makeshift thing, that really just boiled down to a soldering iron. I tried this and had much better results. It’s still tricky to join them, but it’s working well for now. Behold, multi-colored cards!

I stumbled on a filament joiner built by Rich over at his Richrap blog. It’s a pretty cool design, but overly complicated. I’m working on a simplified model that will basically involve a chunk of aluminum and a soldering station with temperature control. (This eliminates the need for the control board and software. I don’t want to disconnect stuff on my printer board to join filament.) I’ll put up a post when I get that all figured out.